

How To Draw A Dog How To Draw A
This tutorial explains how to draw a dog from the side view in four steps going from a rough proportions sketch to a pencil shaded drawing. The canis familiaris in this example is a Husky merely you can use the aforementioned principals to drawing other dogs.
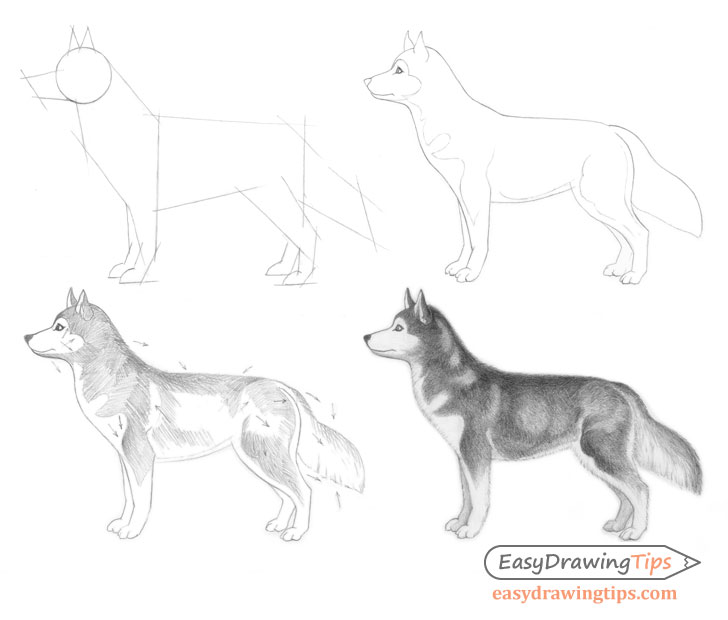
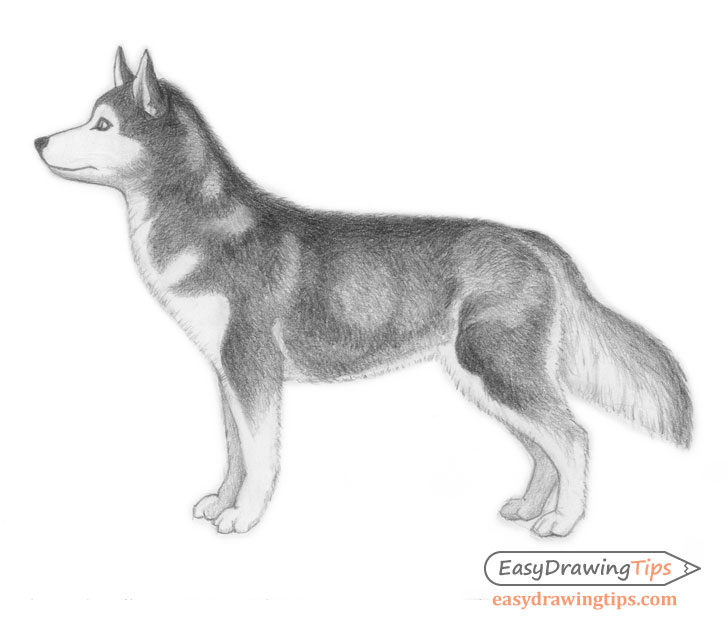
You lot can meet the drawing stages included in the tutorial in the preview image to a higher place.
If you are learning to draw and want to describe a dog the side view is a adept place to start. Information technology'southward a fairly easy view to describe from and allows you to show most parts of the dog.
Step 1 – Brand Construction Sketch of the Dog
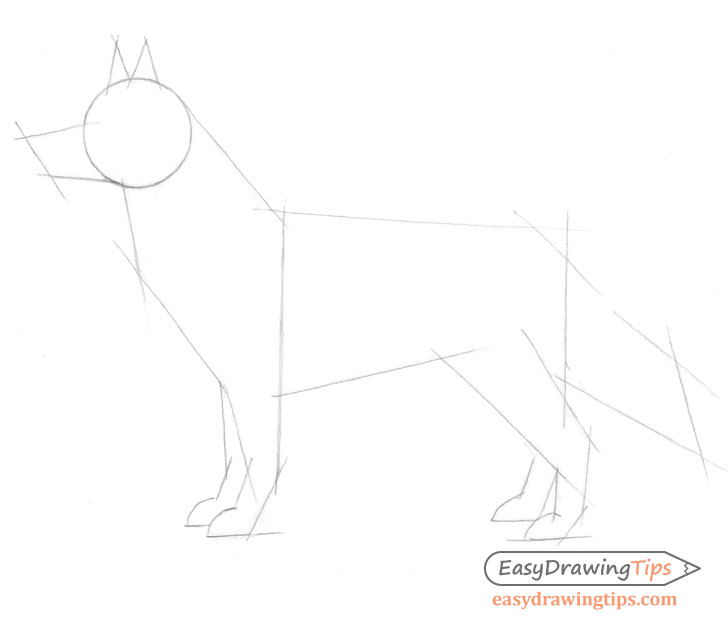
Equally with cartoon simply almost annihilation y'all should start your drawing of the dog by first getting it'southward overall proportions. Practise an overall very light crude sketch of the shape of the dog. Only include the major parts such as the caput (ears included), torso, legs and tail. Leave out the smaller details for the next pace.
You tin can apply basic geometrical shapes where appropriate to help y'all get the proportions. For example the caput is close to a circle and the ears are close to triangles.
Though the sketch stage may wait very crude it's probably the nearly important step in the drawing process. As you describe make sure that all of the dogs body parts are the right size in relation to ane another.
If you start drawing everything separately or from the smaller details you may later observe that dissimilar parts of the drawing are too big, too long or too curt in comparison to one another. This may lead to yous having to kickoff over or having to erase a large part of your drawing.
Step 2 – Make an Outline Drawing
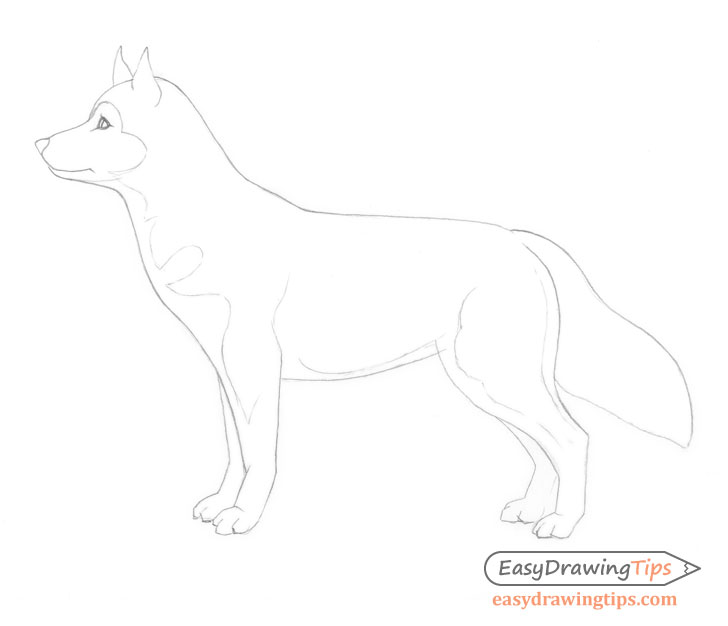
Once you accept completed the proportions sketch create an outline drawing and make clean upward the sketch/guidelines later on of the dog and add the details such every bit the eyes, nose, oral fissure and patter of the fur.
This step should be adequately uncomplicated every bit long as you correctly proportioned the dog in the previous step.
Step iii – Begin Shading
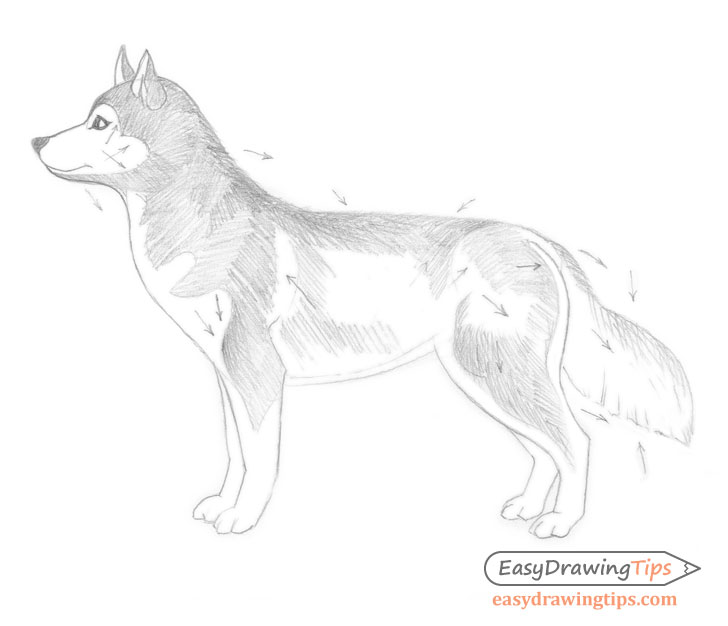
To make the dog's fur expect more than believable apply the shading close to the directions of the actual fur growth.
Keep in mind that the longer fur such as the tail in this example will eventually starting time to hang down.
For more on different types of shading techniques see:
Shading Techniques and Stroke Types Cartoon Tutorial
Stride 4 – Fully Shade & Finish the Dog Cartoon
Slowly apply more and more layers of shading darkening the fur where appropriate. Remember to use your strokes in the management of the fur.
Finally in some places where fur is probable to stick out you can erase the outline of the domestic dog and draw some small strokes there to indicate fur. This tin differ depending on the breed of the dog but for this particular instance you lot can supervene upon most of the outline. The fur on the snout, front of the head and front of the bottom half of the legs will be fairly short and smooth and tin can just be left every bit a line.
Conclusion
Cartoon dogs and other animals can be fairly difficult if you find that you are having trouble you may want to look at photos of real dogs while following the drawing tips provided in this tutorial. Yous should also improve with practice if you lot continue cartoon on a regular basis.
If you've found this canis familiaris cartoon tutorial helpful share it with you friends.
For more tutorials on drawing animals also see:
- Domestic dog's Caput Front View Drawing – Stride past Step
- How to Draw a Lion Full Body Step past Step
- How to Draw a Horse From the Side View Tutorial

Source: https://www.easydrawingtips.com/how-to-draw-a-dog-step-by-step/
Posted by: nolangoormes.blogspot.com
0 Response to "How To Draw A Dog How To Draw A"
Post a Comment